4 Ways to Use Tile in the Kitchen
July 14, 2017
Tiles are one of the most diverse decorating tools in your home renovation repertoire. With a variety of shapes, textures and colours to choose from, this type of material can be made to mesh with most any style and theme of décor. As an added bonus, they make clean-up easier than ever. Just a sponge with a little soap and hot water will typically do the job.
Tiles are not just for the bathroom – your kitchen is another room that can benefit from these small squares. If you are ready for a home renovation project, try one of these four ways to use tile in your kitchen:
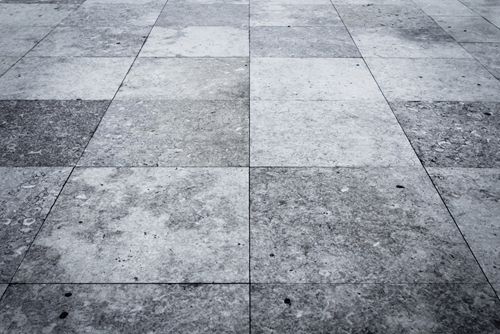
1. Floor
The floor is a fairly standard place to use tiles around the house. But that does not mean that you need to be traditional in choosing how to use them in the kitchen. Black and white tiles can give your room a modern flair, while playing around with multiple colours or different sizes is a creative way to add interest to the space.
To tile your floor, you will need to start by applying a thin set to the surface and smoothing it over with a trowel. Carefully set the backer board down over the thin set and then screw the piece down. Repeat until the whole surface is covered. Add a coating of thin set to the top of the backer board and then begin laying down your tiles. Clean any excess thin set as you go before it dries.
2. Countertop
The counters are an important part of any kitchen. After all, without that space, you would be hard-pressed to chop your produce or mix up some batter. Give your countertop an update with tiles in a neutral colour.
While you can certainly hire someone to do this update, it is also possible to complete the project yourself. DIY Network recommended the following steps:
- Apply thin set to the plywood surface.
- Lay the backer board panels on the thin set.
- Screw the backer board into the plywood.
- Join the field joints using alkali-resistant tape.
- Set the tiles on the counter with room for a grout joint and mark the lines with a pencil to determine how many pre-cut tiles you need.
- Wet the backer board and apply the thin set.
- Use a trowel to comb the thin set to ensure uniform spread.
- Begin placing the tiles and tap with a rubber mallet to secure in place.
- After placing all tiles, wipe off any excess thin set.
- Let dry for 24 hours before placing anything on the counter.

3. Backsplash
A less traditional – but increasingly common – option for using tiles in your kitchen is on the backsplash. A backsplash is a panel – usually comprised of tiles – placed on the area of the wall behind the stovetop just above the range. Creating this element prevents any splatters from staining the wall behind the stove.
Though many backsplashes feature black and white combinations or other simple patterns, your design does not need to be uncomplicated. You can play around with dramatic colours, or even images, to create a focal point in your kitchen.
4. Accent
Adding tiles to your kitchen does not need to be a huge project. If you are looking for a smaller project, consider using the tiles to accent your other décor. For example, you can hang a few large, decorative tiles on the wall or use them as ornamental trivets or coasters.
To complement your tile project, consider updating your kitchen with a new faucet or sink. Visit your local Wolseley Canada Kitchen and Bath Classics to view a variety of options from some of the world's best brands.